Thanks to WordPress themes, you no longer need to hire a web designer and a developer to launch a new website.
Instead, you can choose between thousands of different designs and layouts. You can use a theme as a framework, and with the customization options, you can build a unique look for your website. All this without writing even a single line of code.
What worries some people is that it’s usually pretty easy to see whether a WordPress site is using an off-the-shelf theme. Today, we’ll see what we can do to make it harder.
Why Do I Need to Hide My WordPress Theme Details?
There are a couple of reasons for hiding the name of the theme you’re using. First, it makes your website look more professional. If visitors know that you’re using an off-the-shelf design, they may assume that you haven’t put enough effort into the project and will be less likely to interact with it.
If you convince them that they’re looking at a bespoke product, you have a better chance of boosting your image as a trustworthy business partner.
Removing visible traces of your theme’s name also improves your site’s security. Like any other software product, a WordPress theme can have bugs and vulnerabilities. Hackers are aware of these vulnerabilities, and they know how to exploit them.
Hiding your theme’s details won’t necessarily stop the more determined cybercriminals, but it will definitely make their lives harder. If they can’t see your theme’s name straight away, they won’t know which security hole to target, so they’ll be more likely to move on to the next target.
It definitely makes sense to hide your theme’s name, but before you do, there are a couple of things you might want to take care of.
First, have a look at the theme’s documentation and find out whether the licensing agreement allows you to edit the design. This shouldn’t be a problem if you’re using an open-source theme, but some premium templates have rules that shouldn’t be infringed.
The second thing you need to do is create a backup of the entire site. You will be modifying some key files and folders, so it’s important to have a means of restoring everything back to its original state should something go wrong. Once you’re sure you’re ready to proceed, you can take a look at the options.
Hiding Your Theme’s Details With a Plugin
Not surprisingly, you can find WordPress plugins that hide the theme’s details for you. You have many options, all offering a range of different features and tools. One of the first add-ons that appear on the WordPress official repository is the Hide My WP Ghost Security Plugin. It has over 100 thousand active installations and quite a few five-star reviews, so it’s clear many people like it. Let’s see how it can hide the theme’s name.
After you install the plugin, open the Hide My WP menu from the navigation bar on the right and go to Change Paths.

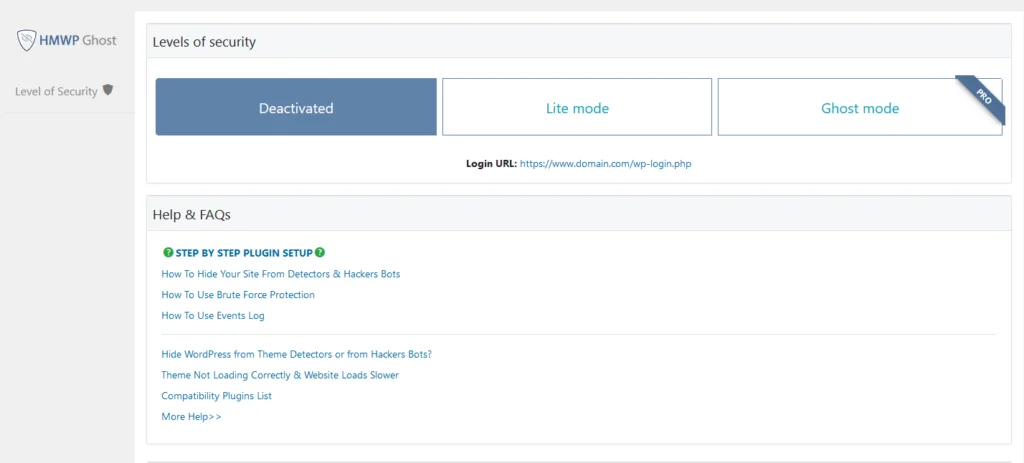
At the top, you’ll see three buttons denoting different levels of security promised by the Hide My WP Ghost plugin. Click Lite mode and confirm your choice.
The plugin sets up some rewrite rules to make the paths to some of the core WordPress resources inaccessible to the outside world. WP Hide Ghost won’t change the actual file paths, but it will prevent hackers from easily guessing your theme after a brief look at the source code.

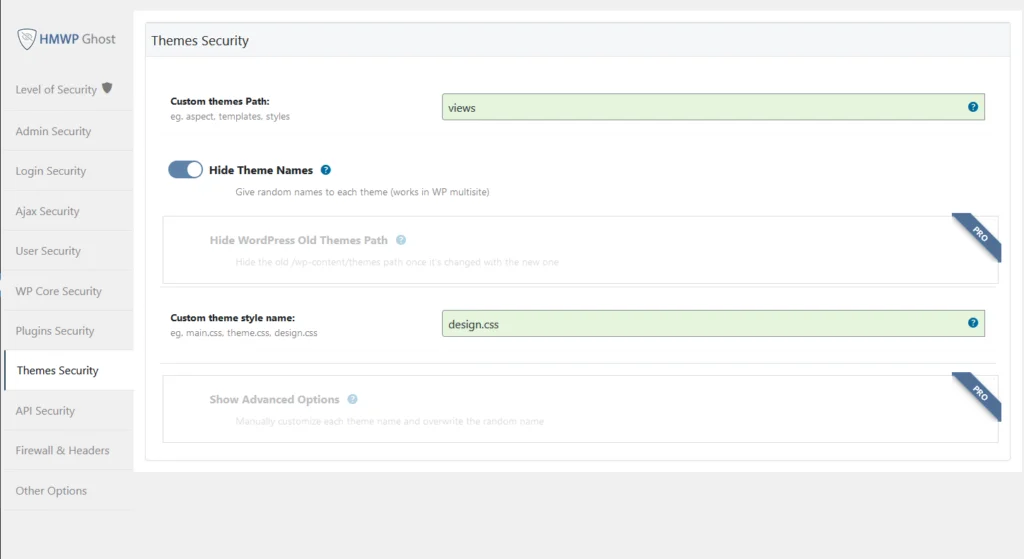
Next, go to Theme Security and confirm that the Hide theme names toggle switch is enabled. If it is, Hide My WP Ghost will attribute random names to your themes. You can also configure your custom theme and theme style paths on this page.

Manually Hiding Your Theme’s Details
Manually hiding your theme’s name is not an overly complicated process, but you need to bear a couple of things in mind. The process involves renaming your theme’s directory and editing its main stylesheet. This may affect your site’s search engine rankings, and it will definitely stop WordPress from automatically updating the modified theme.
If these things don’t present a problem, you can make all modifications via SSH and through an FTP client like FileZilla. However, because it can edit files and folders on the spot, your hosting account’s File Manager is arguably the most convenient option.
You need to navigate to your site’s document root folder (if it’s hosted under your main domain, it will be the public_html directory) and go to wp-content/themes. This is where you’ll see the folders of all the themes currently installed on your site.
Right-click on the folder you want to modify and click Rename.

Your next job is to edit the style.css file in the theme folder. After you open it, one of the first lines will be Theme Name. The name you set here will appear in WP admin.

Removing the Theme’s Name From the Footer
Your site’s footer may contain the theme’s name or a message like “Powered by WordPress.” You need to double-check the licensing agreement to make sure you’re allowed to remove them. If you are, you have a couple of options.
You can do it from the WordPress dashboard. If you’re using a block theme, you get access to the Editor (which is still in beta at the time of writing). It’s basically a what-you-see-is-what-you-get interface allowing you to edit your website’s look. All you need to do to remove text from the footer is click on it and press Delete.

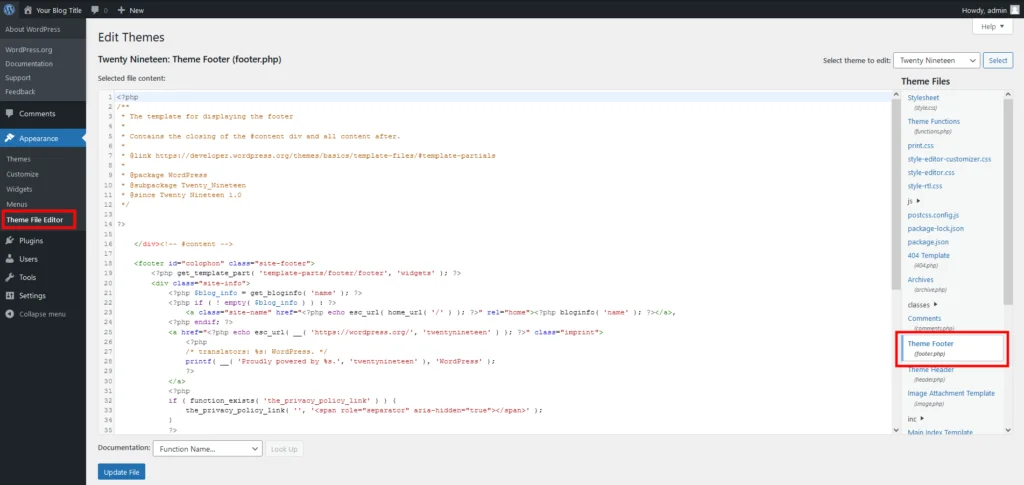
If you’re using a traditional theme, you can use the Theme File Editor. It gives you access to the source code, and what you need to do is select the footer.php file from the menu on the right and remove the code you don’t need.

Bear in mind, however, that if you update the theme, you will lose the modifications you’ve made. To avoid this, set up a child theme, copy the footer.php template file, and edit out the code you don’t need.
The child theme allows you to install all the latest updates without losing any modifications you make to the site’s appearance.
