ScalaHosting’s webmail in SPanel provides a powerful yet easy-to-use interface to manage your incoming and outgoing emails from one platform.
In this article, we’ll explore two ways to sign in to your webmail on the SPanel.
How to Create a Webmail Account?
Before you begin, you need to create an email account through SPanel’s User Interface
Under Email, click Email accounts and fill in the correct credentials on the following page. You need to enter the account name, choose the correct domain from the drop-down menu, and then pick a strong password. Using the Create Email button, you’ll complete the process.
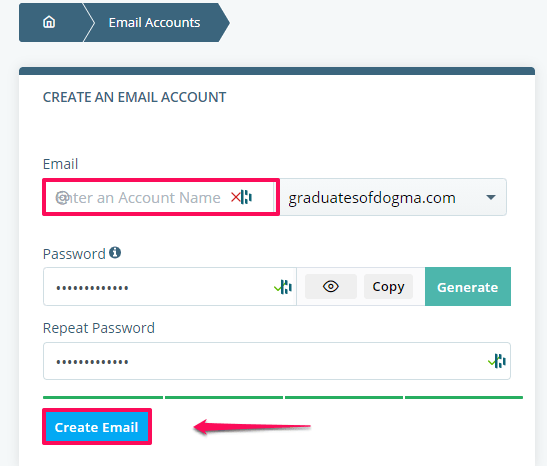
You can see the new email in a list of accounts at the bottom of the page. You can now use Webmail to access its inbox.
How to Sign in to Webmail Through SPanel and Direct Link?
You can log in to your Webmail account in two ways:
- Through the SPanel’s homepage, by clicking Webmail under the Email section.
- Using a direct login URL – yourdomain.com/webmail (make sure you substitute yourdomain.com with your actual domain).
The first method is useful if you haven’t pointed your domain to the new ScalaHosting server. It will allow you to import your existing messages and settings before you set up everything to work with the new account.
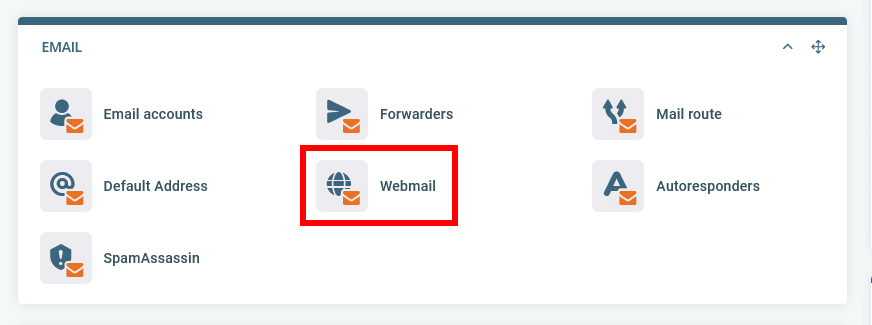
On the webmail login page, put in your email login details you used in the step above. Remember to use the entire email address as a username.

You can go directly to your email inbox on the next page, change your email password, set email forwarders and email responders.
Click on Login to Webmail to go to your inbox.

And that’s how you sign in to Webmail on SPanel.
Now that you’ve accessed your inbox let’s look at the different functions of the webmail sections in your email.
Functions of Webmail Sections in SPanel
The webmail inbox has a similar interface to the usual email account on Gmail and Yahoo! So, it should be easy to figure out most things. But, just in case you were wondering, here’s what each section and button means.
Message Folders
Starting from the left panel, you’ll see a menu button for different message folders. These are their functions.
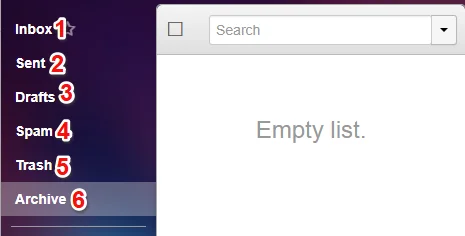
- Inbox: This folder keeps all your incoming messages.
- Sent: This folder stores all your outbound or successfully sent messages.
- Drafts: This folder lets you access incomplete messages you haven’t sent yet.
- Spam: This section of your inbox catches messages that might cause harm to your email account. Also, messages you mark as “SPAM” end up in this folder.
- Trash: This is a bin folder for all your previously deleted messages.
- Archive: Think of this folder as a section for safekeeping. The folder keeps important messages you don’t want to delete but may still need access to in the future. Messages in this folder are somewhat hidden from the inbox or sent folder until you have use for them.
Title Function Bar
As the name implies, you’ll see the title function bar at the top of your mailbox. Let’s dive into what each button does when you click them.

- New Message: The paper-plane button allows you to create and send a new email to a recipient.
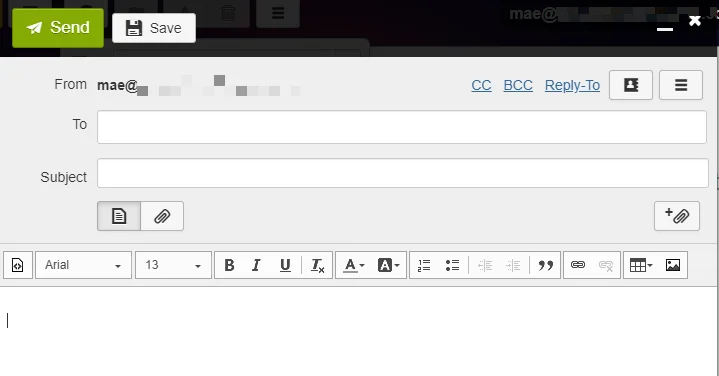
After typing your message, click the send button above to send.
- Contacts: The contacts button lets you add a new contact to your mailing list. But, most importantly, it automatically stores the email addresses of people you’ve sent messages to in the past, regardless of whether it was delivered or not.
- Reload Message List: Click this button to reload your message list—useful for checking new messages at the top of the list.
- Move To: This folder-like button allows you to change message destination folders. To do this, tick a message on a folder before clicking the button. Then, click on any folder on the left panel to move the message.
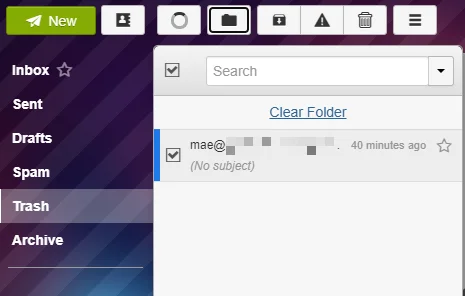
- Spam and Delete: These buttons complement each other. The danger sign button allows you to mark a message as spam, while the bin button trashes it.
When you want to mark a message as spam or trash it, go to the destination folder, tick the message(s), and hit the spam or bin button above, and that’s it!
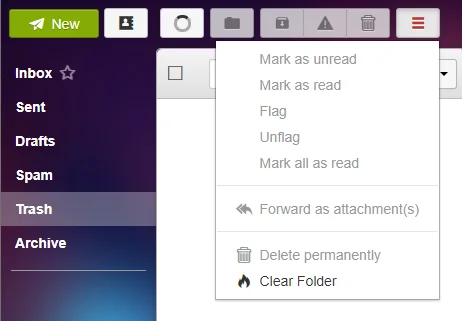
- More: The hamburger button opens a fly-out box when you click it. The box enables you to flag a message, mark a message as unread, read or forward it as an attachment. You can also delete a message permanently or clear a folder.
- Profile Head: This button lets you perform administrative functions such as adding a new account and managing account settings.
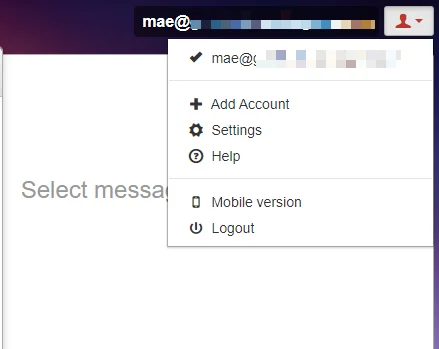
It also lets you log out of your account or access your mailbox on mobile.
Wrap Up
It takes a few steps to send your first mail on SPanel. Follow the steps above, and you’re good to go. Don’t forget to clear your junk or trash folder regularly. You could save on email storage and won’t have email delivery problems.
