Windows, Mac OS, and Linux use Domain Name Servers (DNS) cache to save name resolution information. Think of the DNS as a phone book or directory that indexes websites and their IP addresses.
In DNS caching, your browser or Operating System captures IP addresses you’ve visited recently and saves them in a database. So, instead of rerouting your queries to DNS servers, the system answers them. Since caching keeps the IP addresses you’ve queried, your load time is significantly faster.
However, you may start experiencing connectivity issues if the local DNS cache becomes outdated or corrupted.
A number of things can corrupt the local DNS cache, including viruses and network attacks. But, you can resolve such problems by clearing your DNS cache.
What Happens During Caching?
Imagine that a friend asked you to meet at a restaurant you’ve never been to. If you only have access to the phone book, it might take you longer to get the right address. However, your next visit to the same restaurant will be faster if you save the address.
When you type a website on your browser for the first time, your computer has no reference to it. So, it looks up the address on a DNS server, which in turn links it to the right IP address. Your local DNS then caches this information for easy navigation to sites you visited before without having to query the DNS server each time.
So, Why Clear Your DNS Cache?
As mentioned earlier, different events can lead to your DNS cache becoming corrupted. Sometimes, when website owners change location, they may have to change DNS servers as well. So, the site you plan to revisit may no longer be using the address you have in your DNS cache.
In some other cases, a malware might be trying to redirect popular sites to a malicious one. For instance, an attacker might insert a malicious IP address into your DNS record that redirects you to that address when you try to visit Amazon.
Whatever the case, you can clear your local DNS cache and start afresh.
The Implication of Clearing Local DNS Cache
Clearing a DNS cache leads to the deletion of any saved DNS lookup information. Subsequently, your computer will have to update its data from DNS servers.
The information saved in your DNS cache might include:
- Record name
- Record type
- Time to live (TTL)
- Resource data
- Class
- Resource data length
Let’s see how to clear DNS cache in Mac OS.
How to clear the local DNS cache in Mac
Clearing your DNS cache is fairly simple, depending on your OS and whether you’re clearing it from your browser or computer. For Mac, you’ll have to run the appropriate command in the terminal. However, it’s not a “one size fits all” since Mac has different OS versions.
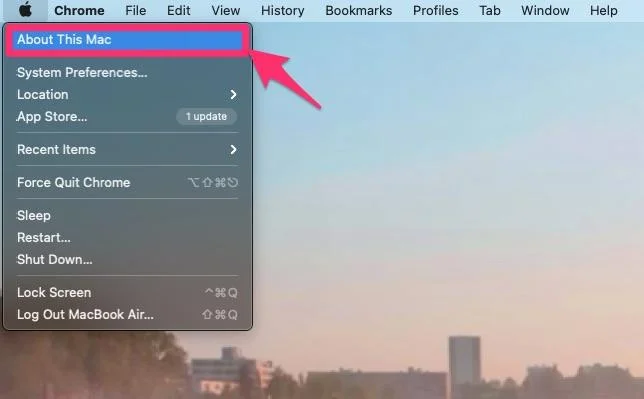
To check your version, go to the apple icon on the top bar of your computer and select ‘About This Mac’ from the dropdown.
The first piece of information you’ll see on the pop-up will be the current version of your OS.
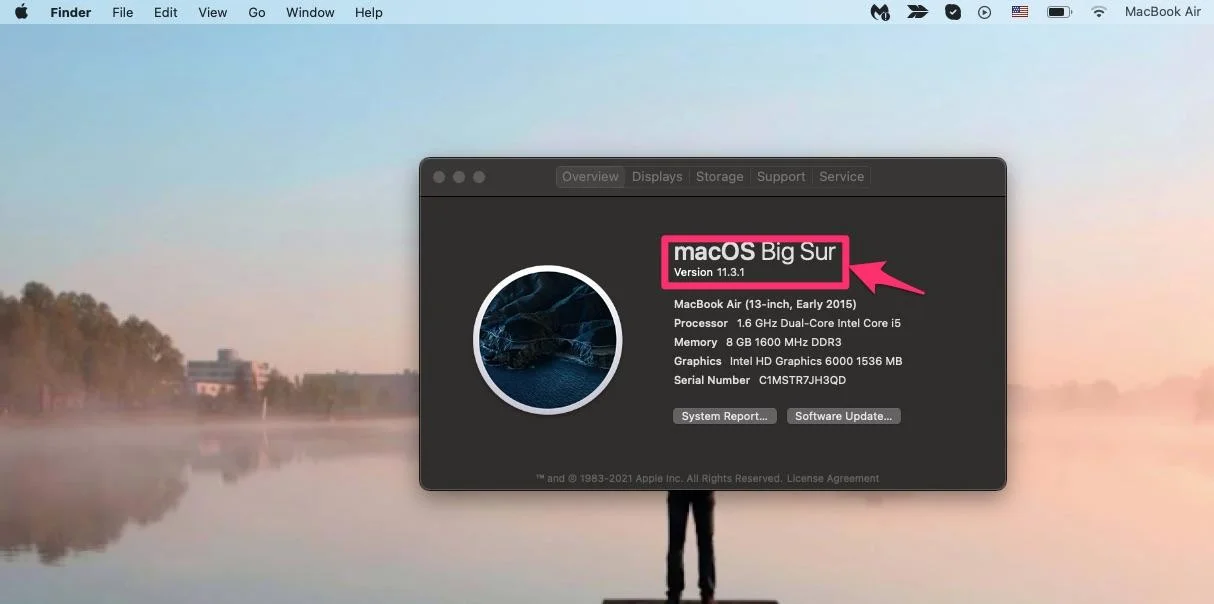
This knowledge helps you know which steps to follow. As mentioned before, regardless of the version of your mac OS, you’ll run the appropriate code in the terminal. However, screenshots here are from Big Sur (11.3).
If you don’t know where to find the terminal, use the search function on the top right side of your desktop.

Then enter ‘Terminal’ in the pop-up.
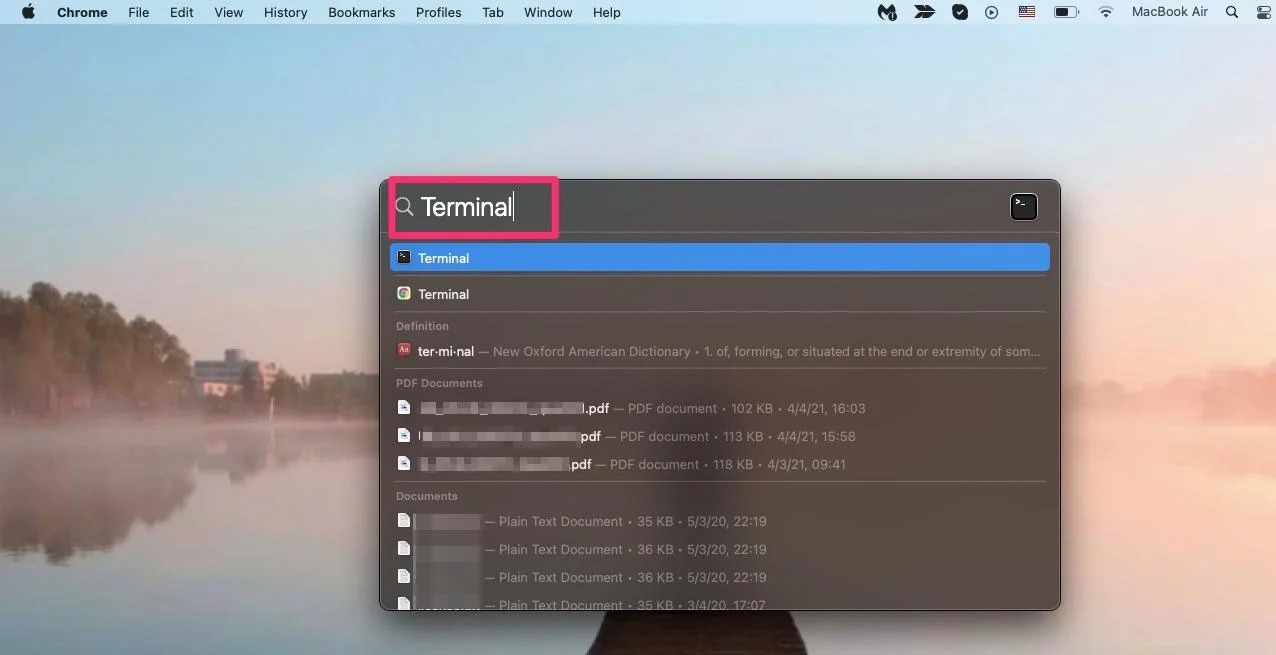
This will open your command line interface.
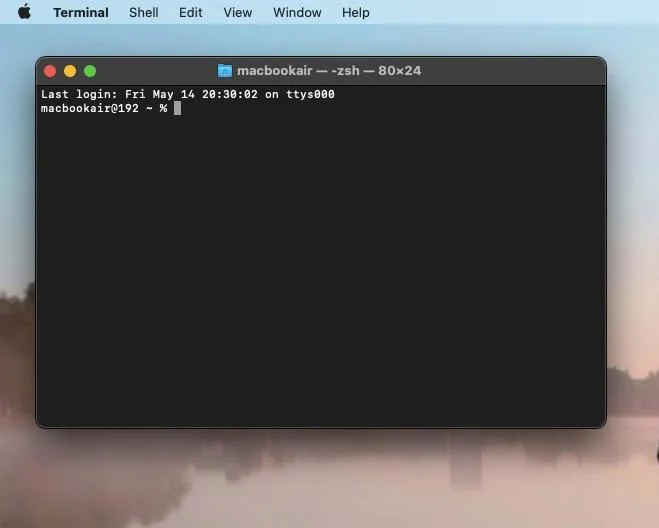
The steps are the same for all the versions until this point.
Now, choose the code to use based on your version.
- macOS Leopard (10.5): sudo lookupd -flushcache
- macOS Snow Leopard (10.6): sudo dscacheutil -flushcache
- macOS Lion (10.7), Mountain Lion (10.8), and Mavericks (10.9)
: sudo killall -HUP mDNSResponder - macOS Yosemite (10.10): sudo discoveryutil udnsflushcaches
- macOS El Capitan (10.11), Sierra (10.12), High Sierra (10.13), Mojave (10.14), and Catalina (10.15): sudo killall -HUP mDNSResponder
- macOS Big Sur (11.2): sudo dscacheutil -flushcache; sudo killall -HUP mDNSResponder
When you enter the appropriate code for your OS, you’ll be prompted to enter your password.
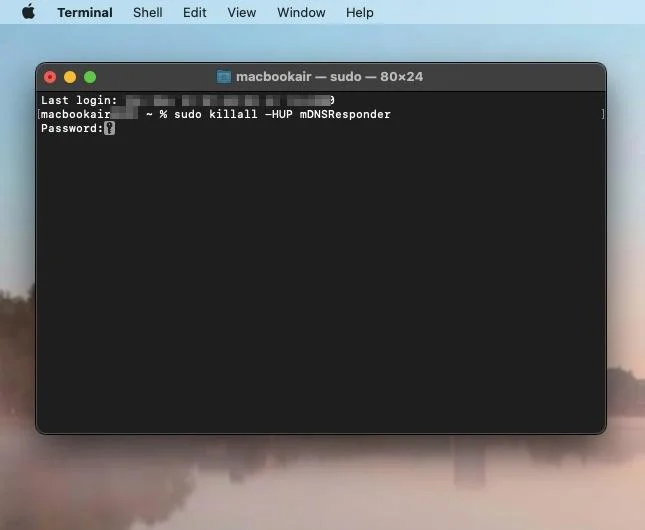
Once you do that, it’ll clear your DNS cache on your computer.
How to clear the DNS cache on Your Browser (Google Chrome)
If clearing the DNS cache in your Mac OS doesn’t resolve the issue, you might have to clear that of your browser.
If you use Chrome, you can clear your browser’s DNS cache by entering ‘chrome://net-internals/#dns’ into the address bar.
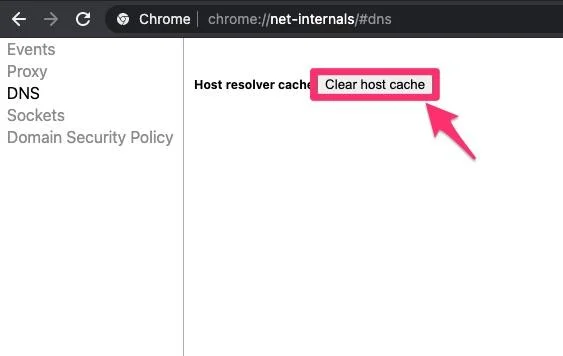
Clicking ‘Clear host cache’ will clear you Chrome’s DNS cache.
Need Help?
Now you know how to clear the local DNS cache in your Mac OS you can go ahead and give it a try. If you need any help you can contact our support at any time. We are available, around the clock.
